Showing posts with label • Me Baking. Show all posts
Tuesday, February 14, 2012
Wednesday, February 8, 2012
First, The Maca-Wrong, then later My First French Macarons.
Then, the Maca-Wrong
I've never paid much attention to these pretty pastel color French cookies before, it's never been in my baking desire, I don't know why, even though I've seen them everywhere around NYC, until one day I happened to read the ingredients of the Macarons, and thought, "Is that IT?...only three major ingredients - almond powder, egg white and powdered sugar?.....Well!, that sounds easY!
Without any much thought, and know-how, I went on making them with those 1-2-3 steps basic how-to, and Bamm! I got the Maca-wrong instead of French Macarons.
Now that, the Macarons
Those Maca-Wrong sent me back to sitting in front of the computer with the little voice in my head "Who are you, Macarons??" I started spending times searching and reading more about making the Macarons including all of those the Facts and the Myths about making them along the way, and gave it a try one more time.
By searching, I found BraveTart the oh-so-inspired pastry blog run by Stella and friends. Stella' s blog fills with many yummy and beautiful pictures of Macarons she made, in that, there is the interesting article she wrote, about the Macarons Myths that made me go back to the kitchen, and whipped my first French Macrons, three days later after my first Maca-Wrong.
As you can see, they turned out not too bad compares to the first Maca-Wrong, well, actually, it might not be that " professionally-perfect ", but, at least I now know what I did wrong at the first time.
I'll be making them again soon because I'm now hooked by them already.
Monday, January 2, 2012
Thai Little Egg Cake
Kanom Kai
Once we have been bombarded with the luxuries for the extended period of times we tend to crave for the simpleness as an antidote. Just like making this our childhood tiny yummy "cake" Thai call ka-noom-kai ( ka-nom=dessert, kai=eggs) to offset the "In The Moment" sumptuous desserts found around here in NYC, and that, my husband asked for kanoom kai instead of cupcakes lately.
I don't know if these Thai dessert could be fit into Western cake category....there is no butter or any shortening nor baking soda in the batch, just tiny air bubble beaten into the eggs that do the rising.
Originally, they are not oven-baked, which is how most Thai desserts are made, I believe these dessert is one of the Portuguese influence, since there are eggs in it, again, traditionally Thai desserts don't have eggs as recipes. That's why some people also call them Kanom Farang, which is what we call the people who comes from the West since the colonial times.
How they are made is to slowly bake them in a preheat brass mold set over an open fire charcoal stove with low heat until they start to rise and are golden crisp giving a texture of cookie-crisp at the outside and cakely soft at the inside.
Since I have to baked them in the oven, the end result wasn't that perfect as the authentic way of making them, but it's good enough to tame our craving for things from our home country.
Make 48 pieces mini muffin size.
- 1 1/2 Cake flour
- 3 Eggs
- 1 cup sugar
- 1 tbsp. vanilla extract
- butter for the pan
1. Preheat the oven at 350F, butter 2 mini muffin pans, set a side.
2. In electric mixer on high speed, beat the eggs until fluffy.
3. Gradually add sugar, and continue beating until the batter turns white at the soft peak.
4. Turn the speed to low, add flour ( divide it to tree times adding) mix the flour just to incorporate, do not over beat it. Turn the machine off.
5 Spoon the batter to the mold, 1/4 inch to the rim of the mold.
6. Bake for 12 minutes or more, use the toothpick to test if they are done.
7. Unmold. These egg cakes are more delicious when eat right away after bringing out of the oven.
Thursday, November 10, 2011
Craving for Cupcakes
Even though I am not a sweet tooth person, still, there is a day that I was craving for yummy cookies and cakes, especially chocolate cakes, and this time my craving for chocolate cupcakes came at night, I checked the pantry and there were no any of chocolate supplies for my cakes, so I just had to go with what I already have in the kitchen.
The easy yellow cupcake was the winner that night. I took the recipe from Martha's, and killed my craving right there.
I 'm not a fan of the icing frosting, wayyyy to sweet for me. So the frosting was just for the show, and was scraped off when I ate it. Happy tummy!!
Friday, June 17, 2011
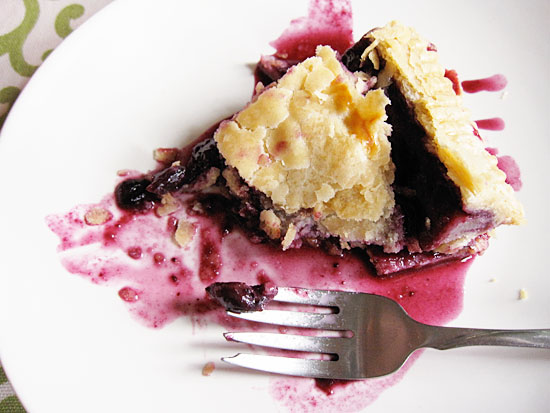
Blueberry Pie

It's time for all berries. They are at reasonable price right now - strawberries, blueberries, raspberries, cherries, etc., and I love it. Yesterday, I got two pints of blueberry for $3, which is a good deal for me when normally I have to pay $4-$5 a pint...Ouch!!
So when I get a good deal of blueberries, I make pie.


This time I used the recipe from Baking with Julia cookbook, and I love it already. The pie crust is flaky crisp, the blueberry filling is delicious with a perfect balance of tang and sweet. It is one of my favorite recipe for now.


The problem is, again, this 9 inches pie is too much for two of us, so I think I have to share it with our neighbor as always.

Wednesday, February 16, 2011
First Attempt, Roll Cake

Well, it's actually not the really first time for me to make this cake. I learned to make roll cake when I was 13 at school, cooking was part of the curriculum, and promised to myself I'll never make it again.
At 13, I found myself enjoy running around town with my bike rather than trying to roll a sheet of cake. Also the teacher wasn't that my favorite one - I just didn't understand how one can look and act cranky all the times. So the roll cake I made with a group of friends at that time wasn't that pretty.

Now that I enjoy cooking and baking (and still love biking ), and have been baking for quite sometimes, but not one of roll cake still.
If I wanted to have roll cakes, I'd run to Japanese bakery nearby and buy the soft cotton Japanese style roll cake. Never attempt to try.

A day before Valentine's, I wanted to bake something for my hubby - he did mention pies, but I didn't hear it, maybe *0* I always bake pies for him, so this time I wanted to bake something I never bake before, and roll cake just POP into my mind.....It's time baby!
I went to Martha's site and choose one recipe to try on. The cake was almond cake, spread with raspberry jam, and a thick layer of whipped cream.


We both are not big fans of sweet, so we love these combination of sweet raspberry jam and thick layer of plain whipped heavy cream.
The plain whipped cream helps tone down the very sweet jam. For us, they complement each other very well.

As for the cake, I might have baked it too long, the cake came out a bit dry, and that's why it has to be a second attempt for me.
And yes!...a lot of practicing on rolling as you can see.

Thursday, October 14, 2010
Devil's Food Cupcake

Last week we went for a walk in west village and turned the corner at Magnolia on Bleecker street. I have to say though, since I've been living in NYC for ten years, I've never had famous Magnolia's cupcakes just yet.
Line snaking to the side of Magnolia Bakery on Bleecker St.

The long line in front of the store always turns me off. But because of this long line in front of Magnolia that I finally learn how to make cupcakes myself.
I'm not a big fan of sweet, but I always fall for cute cupcakes, and that makes me want to try to make them.


My only favorite kind of cake is chocolate cake, and these the Devil's food cake is my show off. This time I tried the recipe from Martha Stewart's.
I love it! This recipe makes the cupcakes that is not too sweet, which is the way I love.

Kudos for those who create super cute, yummy looking cupcakes...well....to me, trying to come up with how to make my cupcakes look cute and tempting is just....not that easy.

Thursday, July 1, 2010
Pullman Bread

When I wanted to try to baking breads, I chose this Pullman Bread to be my first try. I just thought that if I knew how to bake this basic bread, I'd never buy sandwich breads again, and we never buy them since.
It really feels good to have a sandwich with your own homemade bread. The fresh taste and homey smell makes everyone happy.

When I first try this recipe, it came out a bit salty for us. I thought the recipe was giving a wrong portion of salt then I remember the surprising face on one of my friend when I told her that we eat rotis with condensed milk and sugar sprinkled on top.
She thought it was weird because when it comes to table breads most westerners love their breads in a bit of salty side.

When I don't bake my own breads, I usually go to Panya, the Japanese bakery on 9th street btw 3&2 Ave. They have white breads just like what we have in Thailand - the familiar taste and texture.
So in this recipe I reduced salt and adjust sugar.
- 4 1/2 cups bread flour, plus more for dusting
- 3 1/2 teaspoons instant yeast
- 1/2 tablespoon coarse salt
- 1 tablespoon sugar
- 1/3 cup nonfat dry milk
- 2 tablespoons unsalted butter, room temperature
- 1 3/4 cups warm water, vegetable oil for bowl and pan

1. Combine the flour, yeast, salt, sugar, dry milk, and butter together with the electric mixer fitted with a dough hook. Add the warm water, and beat on low speed until the dough smooth and elastic, about 5 mins.
2. Oil lightly another large bowl for resting the dough. Turn the dough onto a lightly floured work surface and starts knead it by hand about five times to make sure that the dough is fully incorporated, and forms a smooth ball. Put the dough into the oiled bowl, cover it with plastic wrap, let it rise in a warm place until doubled in bulk, about 1 hour.
3. Punch down the dough (one punch is enough) to release air. Pull all the side to the center (a punch hole) Invert the dough in the bowl, so the smooth side is up. Cover it with the plastic wrap again, and let it rise for about 1 hour more.
4. Generously brush a 13" Pullman loaf pan with vegetable oil, making sure to coat the underside of the lid, and all sides of the pan. Set aside.
5. Turn out the dough onto the lightly floured work surface. Using a rolling-pin, roll out the dough to a 13-by-8 inch rectangle, with the long side facing you. With your hands, roll the dough toward you, gently pressing as you go to form a tight log. Pat in the end to make it even. Gently roll the log back and forth to seal the final seam.
6. Place the log into the prepared pan, seam side down. Close the lid with three-quarters left open. Let it rise in the warm place until the log almost touching the lid, about 45 mins. Meanwhile, preheat the oven to 425F
7. Close the lid completely and bake, rotate the pan halfway through, until the loaf is light golden brown, about 45 mins.
8. Reduce the temperature to 350F, and continue baking for another 30 mins.
9. Transfer pan to w a wire rack, let it cool down for 10 mins. ( the bread should have a hollow sound when tapped on the bottom, if not, continue baking and checking at every 5 mins. until the crust is deep golden brown.
10. Remove the bread form the pan, let it cool down completely before slicing.
Tuesday, May 11, 2010
Childhood Calling, Checkerboard Cookies

I just had the urge for easy cookies - I mean easy like...easy recipe, not a Fancy Shmancy recipe - just something that I can make it with what ever I already have in the cabinet.
And this is my version of easy cookies for Sunday afternoon which also reminds me of my childhood cookies.


I don't like too sweet cookies and this recipe is perfect for me. The cocoa powder really makes a different for these cookies. It gives the real taste and smell of chocolate - dutch process cocoa powder is used for the recipe.
- 1 cup unsalted butter, softened
- 1/2 cup sugar
- 1/4 tsp. pure orange extract
- 1/4 tsp. salt
- 1 tsp. pure vanilla extract
- 2 3/4 cups sifted all-purpose flour
- 3 tbsp. Dutch-process cocoa powder
- 1 large egg

1. Cream the butter and sugar together until well blend then add the vanilla extract, orange extract and salt.
2. With mixture on low speed, gradually add the flour. (scraping down the side of the bowl if needed) Mix until all incorporate. The mixture will be loose and crumbly.
3. Turn the dough onto a work surface and knead the dough by using the heel of your hand pushing small amounts of the dough away from you for 2 - 3 minutes.
4. Divide the dough in half. Sprinkle cocoa powder over one of the halves. Knead until the cocoa powder has been fully incorporated.
Making checkerboard pattern


1. Put each half of the dough between two sheets of plastic wrap. Using a rolling pin to shape the dough into 7 inches square - about 3/8 inch thick then cut the dough into long strips - 3/4 inch wide using the sharp knife and ruler for a perfect cut.
2.Whisk together the egg and 1 tbsp. of water.
3. Cover the work surface with plastic wrap, place three trips of dough on plastic, alternating white and chocolate strips.
4. Brush tops and in between strips with egg wash. Gently press strips together. Repeat, forming second, third or fourth layers to from the checkerboard pattern.
5. Wrap the assembly log with plastic wrap. Put it the the freezer for 15 minutes or 30 minutes in the fridge.
6. Repeat the same process to finish the second log.
7. Heat oven to 350F, line the baking sheet with parchment paper. Slice the log into 1/4 inch thick slices. Bake until done - about at least 12 minutes.
8. Remove the cookies from baking pan, transfer to wire rack to let them cool completely and store them in an airtight container.
Saturday, June 27, 2009
Thai Fragrant Cookies, Kanom Kleeb Lumdual
Kleeb Lumdual, Thai Cookies

I wish you could smell and taste these delicious yet beautiful Thai cookies. I don't know exactly when it started, but I know that these fragrant cookies have been around in Thai cuisine for many decades.
Rumduol or Lumdual is the name of the national flower of the kingdom of Cambodia. The plant belongs to an Annonaceae family. The flowers have a very lovely sweet scent. I remember when I was a little, I used to play under the Annonaceae shrub we call Nom Maew or Cat's nipples flowers because of the size and....have you ever seen cat's nipples? The Cat's Nipples flower is a close cousin of Rumduol flowers only that they are much smaller than Rumduol.
Rumduol Flowers

What makes these lovely Thai cookies distinctive, besides their look, is the way they are scented. Since most traditional Thai desserts have very simple ingredients, flour and sugar, they need to be scented after finished.
The Thai fragrant candle, or Tien-Ob, in Thai, is a candle that is made out of bee wax mixed with a bunch of dried fragrant herbs and frankincense, is used for scenting Thai desserts since the old time.
Thai Fragrant Candle, Tien Ob

Even though these cookies are made out of very simple ingredients, they are quite pricey because of the times and effort put into making them. I used to whine a lot when I knew how much I had to pay per gram for these cookies.
From now on, I will keep my mouth shut if I had to buy them again because I now know how much effort I have to put in to shape up each flowers.

It needs gentle hands and patience to shape them into delicate flowers resembling the real Rumduol flowers.
Believe me, my version, as you see here from the pictures, is not even close to those that is made by professional which are smaller, look more delicate and prettier than what you've seen here, and that is the price you pay for.

But, hey, my mom already cried seeing I can make these kind of delicate Thai dessert.
Simple ingredients kill.
Make about 30+ flowers
- 2 cups, all purpose flour
- 1 cup, sugar powder or icing sugar
- 1 tsp. salt
- 1/2 cup + 2 tbsp. vegetable oil
- Thai fragrant candle for scenting
1. Mix flour, sugar, salt together.
2. Gradually drizzling in the oil. Mix them throughly. Be careful not to make the mixture too wet.
* Testing by grabbing a small handful of mixture and squeeze it tightly in your palm, shape it into a small ball. If you cannot shape a ball, the mixture is too dry. Little by little, add more oil. If you feel the oil in the ball, it is too wet, add little flour.*
3. After the mixture is well mixed, start making Rumduol flowers.
Making delicate flowers.

1. Shape the mixture into one inch balls, or if you wanted to feel like a pro, make them a half inch ball.
2. Cut the ball in to four pieces to form petals.
3. Attach three petals together, using your finger tip to smooth out the top where they are met, so the petals won't separate when baked.
4. Make a tiny tiny ball, attach it into the middle of the three petals, slash the tiny ball open with a sharp knife.
5. Put them on a cookie baking sheet. Send them to the pre-warmed oven with 350F for 12 minutes. These cookies should look off-white, not yellow crispy kind of cookies.
6. Take them out of the oven, let them cool down completely on a cookie rack before scenting.
Scenting the cookies

1. You need a wide open jar with a lid.
2. Place a small dipping bowl at the center, inside the jar.
3. Piece by piece, carefully place each flowers into the jar.
4. Light both of the candle wicks, make sure they are well burned to the wax before blowing them out.
5. As soon as the candle is blew out, place it on the small dipping bowl inside the jar, close the lid right away, keeping the candle smoke lingering inside the jar until faded.
6. Your lovely edible Rumduol flowers are scented.

The best Kanom Kleeb Lumdual cookies should be off-white in color, but here I used unbleached flour, so the color is not that white, and it supposes to melt in your mouth when you eat it.
I do really wish you could smell it...Loveeeeely!

I wish you could smell and taste these delicious yet beautiful Thai cookies. I don't know exactly when it started, but I know that these fragrant cookies have been around in Thai cuisine for many decades.
Rumduol or Lumdual is the name of the national flower of the kingdom of Cambodia. The plant belongs to an Annonaceae family. The flowers have a very lovely sweet scent. I remember when I was a little, I used to play under the Annonaceae shrub we call Nom Maew or Cat's nipples flowers because of the size and....have you ever seen cat's nipples? The Cat's Nipples flower is a close cousin of Rumduol flowers only that they are much smaller than Rumduol.
Rumduol Flowers

What makes these lovely Thai cookies distinctive, besides their look, is the way they are scented. Since most traditional Thai desserts have very simple ingredients, flour and sugar, they need to be scented after finished.
The Thai fragrant candle, or Tien-Ob, in Thai, is a candle that is made out of bee wax mixed with a bunch of dried fragrant herbs and frankincense, is used for scenting Thai desserts since the old time.
Thai Fragrant Candle, Tien Ob

Even though these cookies are made out of very simple ingredients, they are quite pricey because of the times and effort put into making them. I used to whine a lot when I knew how much I had to pay per gram for these cookies.
From now on, I will keep my mouth shut if I had to buy them again because I now know how much effort I have to put in to shape up each flowers.

It needs gentle hands and patience to shape them into delicate flowers resembling the real Rumduol flowers.
Believe me, my version, as you see here from the pictures, is not even close to those that is made by professional which are smaller, look more delicate and prettier than what you've seen here, and that is the price you pay for.

But, hey, my mom already cried seeing I can make these kind of delicate Thai dessert.
Simple ingredients kill.
Make about 30+ flowers
- 2 cups, all purpose flour
- 1 cup, sugar powder or icing sugar
- 1 tsp. salt
- 1/2 cup + 2 tbsp. vegetable oil
- Thai fragrant candle for scenting
1. Mix flour, sugar, salt together.
2. Gradually drizzling in the oil. Mix them throughly. Be careful not to make the mixture too wet.
* Testing by grabbing a small handful of mixture and squeeze it tightly in your palm, shape it into a small ball. If you cannot shape a ball, the mixture is too dry. Little by little, add more oil. If you feel the oil in the ball, it is too wet, add little flour.*
3. After the mixture is well mixed, start making Rumduol flowers.
Making delicate flowers.

1. Shape the mixture into one inch balls, or if you wanted to feel like a pro, make them a half inch ball.
2. Cut the ball in to four pieces to form petals.
3. Attach three petals together, using your finger tip to smooth out the top where they are met, so the petals won't separate when baked.
4. Make a tiny tiny ball, attach it into the middle of the three petals, slash the tiny ball open with a sharp knife.
5. Put them on a cookie baking sheet. Send them to the pre-warmed oven with 350F for 12 minutes. These cookies should look off-white, not yellow crispy kind of cookies.
6. Take them out of the oven, let them cool down completely on a cookie rack before scenting.
Scenting the cookies

1. You need a wide open jar with a lid.
2. Place a small dipping bowl at the center, inside the jar.
3. Piece by piece, carefully place each flowers into the jar.
4. Light both of the candle wicks, make sure they are well burned to the wax before blowing them out.
5. As soon as the candle is blew out, place it on the small dipping bowl inside the jar, close the lid right away, keeping the candle smoke lingering inside the jar until faded.
6. Your lovely edible Rumduol flowers are scented.

The best Kanom Kleeb Lumdual cookies should be off-white in color, but here I used unbleached flour, so the color is not that white, and it supposes to melt in your mouth when you eat it.
I do really wish you could smell it...Loveeeeely!
Subscribe to:
Posts (Atom)